After finding the allure of Go Hero products and being given some new clay to try out I decided come rain or shine to try and create a little man from scratch.
I shall warn you now before you go any further, the end result is not for the faint of heart… but it could have gone tits up a whole lot more than it did.
Whatever the result was, I was going to document it.
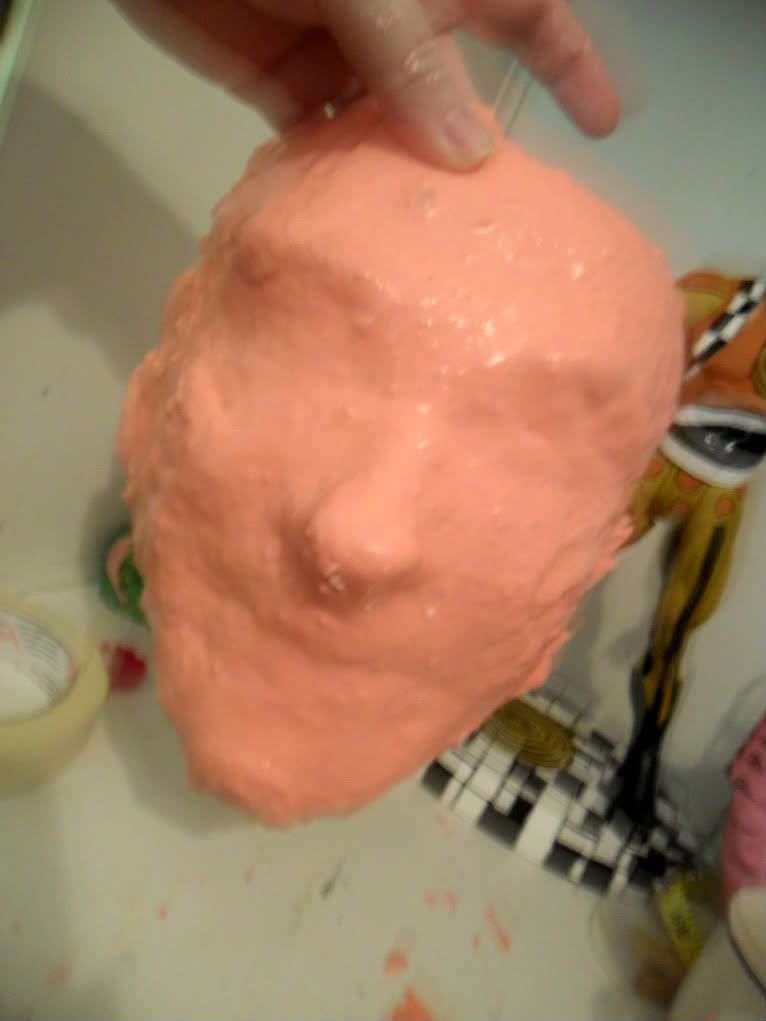
I used nylon enforced clay with silicon. I must say it was a little strange to use, this stuff was hairy inside so made any kinda cutting hard as the fibres would stick to the blade.
It was fairly pliable but I made many mistakes. I was using it as I would Fimo and flying blind on how and where the best place was to start.
I had no special sculpting equipment so used my fingers, water, a cotton bud and a rubber tipped pastel pushing art tool.
Thinking of how plastic figures are put together I took each limb separately then attached by gluing… not a good idea as the glue, even super glue does not stick!
So using epoxy to bond the pieces together which added extra length to each limb giving the appearance of swollen thighs and shoulders.
Muscles sure do take strange shapes...especially if you Google ‘human male muscle anatomy’ but mostly, if not all were not natural and bordering on the gross.
A normally shaped male muscle formation is harder to find than one would think, so did it from my head instead. 2nd mistake…
I was using plenty of water to smooth the clay which in hindsight would have been better if it had just been sanded as too much water made the clay crack which weakened the whole thing to the point of toppling.
Again… epoxy was used as a filler then filed down.
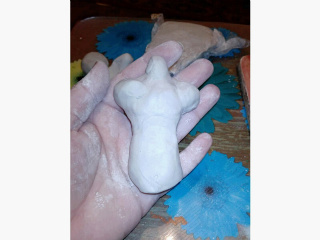
First step : I decided to see if I could get a basic torso shape. I was channelling the idea of the DC Universe body, the way the shoulders round and the basic ^ shape for the neck.
I wanted to create something with movement. I was hoping I could do this via creating texture within his clothes but at this stage of the game I am ahead of myself in ability.
The shoulders I tried to place one leaning back and the other slightly forward as in this guy’s comic appearances he spends the majority of it fighting.
Meh… it looked OK, so what next?
I needed something to support it and build around.
Next were the base and two legs. You can see the slight cracking on the thighs which is what I was meaning by using too much water. Luckily it flaked off and could be smoothed.
Attaching the torso was the epoxy way again…which was OK as it was hidden by his jacket so there is not really any groin he just has a hollowed out shape then filled with the epoxy to push the torso into place. Keeping the legs spread slightly would balance out the weight more effectively.
I then left it 24 hours to fully harden.
The following night was the addition of the arms, making any kinda detail to resemble fingers was tough going as I found the clay could be washed away or the opposite and looked like big fat sausages, so just left them as a basic indication of a hand shape.
Attached to the torso in the same way as the legs.
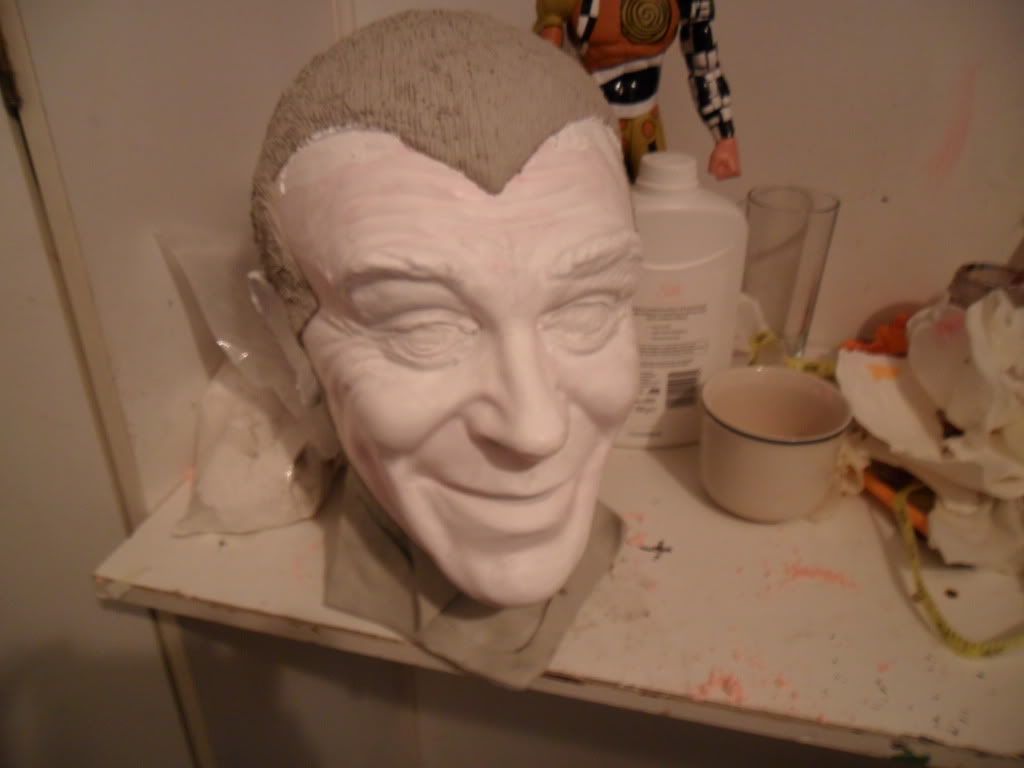
This guy sports a HUGE trilby, I really enjoyed making the hat but to go with an oversized hat, you get an oversized head… I hollowed out a small amount of clay so it could be placed onto the neck and filled and secured with the epoxy, rather than stuck on at an angle. I’m happy with that.
At this point though, this little man had more cracks than 18th century China… fairly superficial cracks but still the potential to become something more.
I reached for the ‘no more nails’ glue I had been sticking up the towel rail with earlier that night and filled them with that, then rubbed epoxy into them…. Ick… this was messy BUT it held together.
The need to disguise the cracks was fairly strong so decided to primer him and give his first coat. After it dried the details were added and the cape.
With the angle and bend in the back leg and foot withthe weight of the cape made the whole thing topple.
So more support on the base was added with the creation of standing on rocks, it was easier to give support to the back leg this way.
So the final step of giving him the last coat of paint… so who is this guy?
This little man is called 711 he appeared in the first Police Comics alongside Plastic Man, Firebrand and the bad ass Mouthpiece. 711 got his name as this was his prison number from which he had escaped.
In true Golden Age style, they can’t keep it straight if his outfit is all shades of red or his cape is green. I chose the green as I thought it made him slightly more interesting.
What makes this guy important?
He is the first character to ever be killed within comics something which these days means nothing as we know they will be back, but as far as I am aware 711 has not made a comeback, not even as a lantern of somekind or zombie!!! ;p
I have enjoyed the whole sculpting experience and I haven’t been put off by it.
I want to try again and not make the mistakes I did and already know who and what I want to attempt. It has made me far more aware and appreciative of the work and skill that goes into making figures.
As a geek within an online geek community I think we can be all be too quick to call the shit out figures if they are not 100% comic accurate to how we visualise them.
I am not talking about costume designs as that should be correct but we all perceive them slightly different and sometimes I think we should give these artists a break from our nerdom…
Granted I have hit 711 with the ugly stick but that is lack of ability, not that I wanted to.
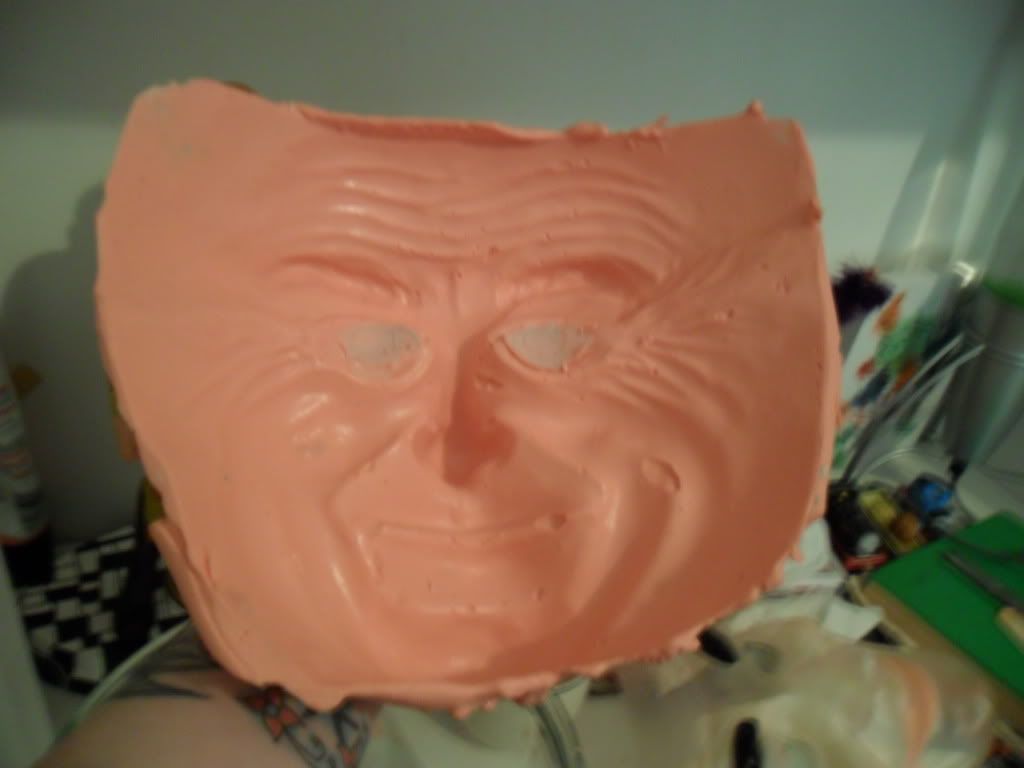
Creating facial features I found the most complicated thing of all and will no longer look at ANY pre bought little man in the same way ever again!
So 711 stands his whole 9" on my desk next to my computer alongside of my very first paint job Spellbinder.
For a first, I do feel it could have been a lot worse, but bring on the next one… let’s get some improvement going on this…